

A Complete Guide to a Keyboard-Driven, Tiling, Multi-Desktop Workflow
If you think “Windows power user” just means installing PowerToys and memorizing a few shortcuts, you’re still living in beginner mode. The real Pro Mode of Windows 11 is when you stop dragging windows with a mouse, stop staring at a bloated taskbar, and start driving your desktop like a Formula-1 cockpit — pure keyboard, zero clutter.
In this guide, we’ll walk through how to turn Windows 11 into a minimal, distraction-free, tiling-style workspace, inspired by Linux window managers and macOS automation tools. You’ll learn how to strip away the UI noise, master virtual desktops, and operate entirely by keyboard.
Why Go “Pro Mode” on Windows 11
Windows has always been a visual, mouse-driven operating system. But beneath all that UI fluff hides one of the most flexible workflow environments ever made — if you know how to tame it.
Benefits of going UI-light and keyboard-first:
- Faster window management without hand travel
- Better task separation using multiple desktops
- Less visual fatigue — fewer animations, borders, and toolbars
- Predictable, repeatable workspace layouts
- Reduced context switching and fewer distractions
When you’re deep into coding, writing, or creative work, every pixel counts. The less you see, the more you can think.
1. Hide the Interface: Build a Distraction-Free Windows 11 Setup
You don’t need to delete Explorer or uninstall the taskbar (though some of us have been tempted). Instead, you can simply remove the clutter and minimize visual overhead.
System Tweaks
- Auto-hide the taskbar
Settings → Personalization → Taskbar → Automatically hide in desktop mode - Disable desktop icons
Right-click desktop → View → Show desktop icons (uncheck) - Turn off animations & transparency
Settings → Accessibility → Visual effects → Disable animation effects - Adjust for performance
In System → Advanced → Performance Settings → Adjust for best performance - Use a minimalist wallpaper or plain color background
This gives you a calm, clean canvas — the “silent mode” of Windows. No widgets, no badges, no candy-colored icons. Just you and your work.
2. Master Virtual Desktops in Windows 11
Windows 11 finally gave virtual desktops the maturity they deserved. You can isolate workspaces for coding, writing, browsing, or meetings — each one feeling like its own focused environment.
Default Shortcuts
| Action | Shortcut |
|---|---|
| Create a new desktop | Win + Ctrl + D |
| Switch to next/previous desktop | Win + Ctrl + → / ← |
| Close current desktop | Win + Ctrl + F4 |
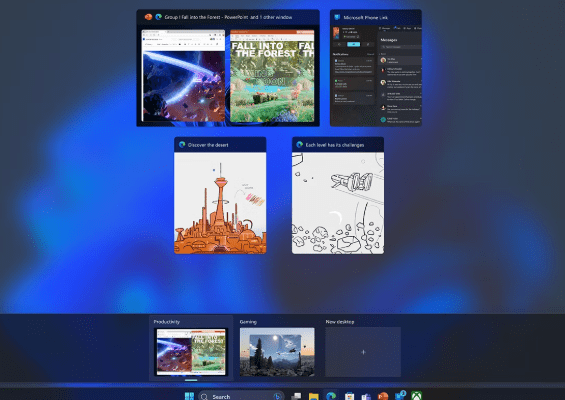
| Open Task View overview | Win + Tab |
Power Tips
- Rename desktops: in Task View, right-click the desktop name
- Assign apps to a specific desktop
- Give each desktop a unique wallpaper for visual cues
- Combine with AutoHotkey or PowerToys FancyZones to auto-arrange windows per desktop
Once you start assigning themes like “#1 – Focus,” “#2 – Reference,” and “#3 – Chat,” you’ll never want to return to one messy desktop again.
3. Go Fully Keyboard-Driven
A true Pro Mode setup is about hands-on-keyboard permanence. Every window, every desktop, every switch should be triggered without the mouse.
Essential Native Shortcuts
| Task | Shortcut |
|---|---|
| Snap window left/right | Win + ← / → |
| Maximize / minimize window | Win + ↑ / ↓ |
| Move window between monitors | Win + Shift + ← / → |
| Show desktop | Win + D |
| Open Snap layouts | Win + Z |
These are table stakes. You’ll need more power to reach escape velocity.
4. Add a Tiling Window Manager for Windows 11
Here’s where things get interesting. You can bring Linux-style tiling window management to Windows, thanks to several open-source projects. These tools let your windows snap, resize, and rearrange automatically based on rules — no dragging required.
Top Tiling Window Managers for Windows 11
| Tool | Highlights | Notes |
|---|---|---|
| GlazeWM | i3-inspired, elegant config system, strong community support | Slight learning curve; config via YAML |
| FancyWM | Dynamic layouts, per-desktop profiles, lightweight | Great for new users |
| Komorebi | Scriptable, AutoHotkey integration, powerful automation | Best for tinkerers |
| bug.n | Lightweight, pure AutoHotkey approach | Good for old hardware |
| workspacer | C#-based, simple config, tiling + floating hybrid | Actively developed |
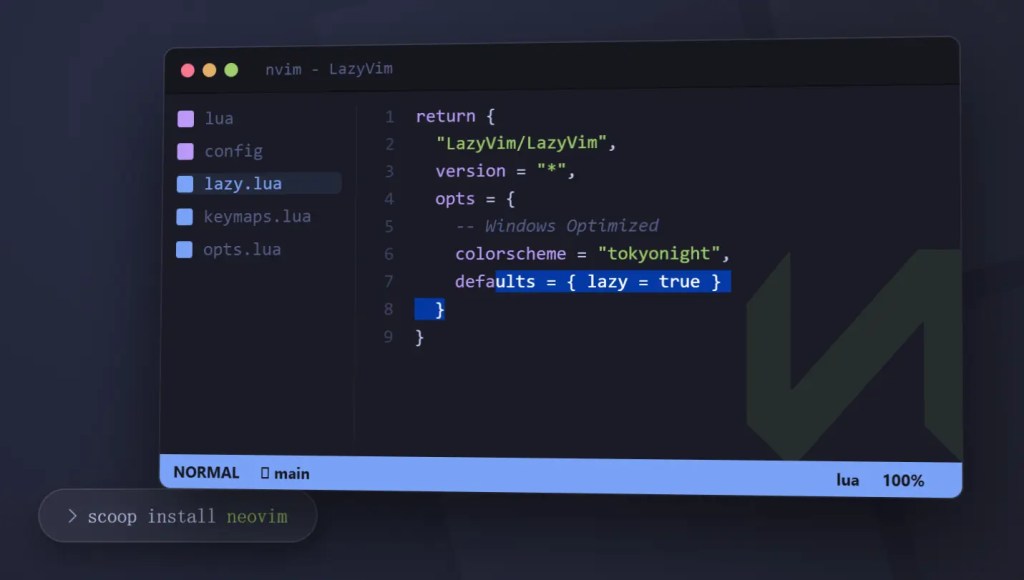
Example workflow using GlazeWM:
- Focus window:
Alt + J / K / L / ; - Move window:
Alt + Shift + J / K / L / ; - Change layout:
Alt + Space - Toggle floating:
Alt + Shift + F - Restart WM:
Alt + Shift + R
Once configured, your desktop behaves more like a coding IDE — intelligent, predictable, and infinitely faster.
5. Automate the Layout Rules
Once you’ve got tiling working, go further with rules and triggers:
- Launch your browser → always open on Desktop 2
- Open your IDE → tile on the left half of the screen
- Floating exceptions → keep dialogs, chat apps, or settings windows free
- Use startup scripts to auto-spawn layouts for specific projects
Both GlazeWM and Komorebi support layout files, so your system boots directly into your personalized window grid. It’s the closest thing to “session restore for humans.”
6. Real-World “Pro Mode” Example Setup
| Component | Tool / Setting |
|---|---|
| Window Manager | GlazeWM |
| Launcher | Flow Launcher |
| Clipboard Manager | Ditto |
| Terminal | Windows Terminal + PowerShell 7 |
| Automation | AutoHotkey scripts |
| Notes / Tasks | Obsidian / Todoist |
| File Search | Everything or Listary |
| Theme | Plain dark gray, no transparency |
Virtual Desktop Layout:
- Desktop 1 – Code / Terminal
- Desktop 2 – Research / Browser
- Desktop 3 – Communication (Teams, Slack)
- Desktop 4 – Design or Writing
Everything’s one shortcut away. No drag-and-drop chaos.
7. Common Issues & Fixes
- App Incompatibility: Some Electron apps ignore tiling rules. Use floating mode.
- Multi-Monitor Conflicts: DPI scaling can misalign layouts. Set all monitors to the same scale factor.
- Shortcut Collisions: Always remap system keys carefully in GlazeWM config.
- Crashes / Restart Loops: Keep your config minimal, test after each change.
Conclusion
Windows 11 doesn’t need to copy Linux to be efficient. It just needs you to stop treating it like a toy.
Hide the noise, split your workspaces, and take full control of your screen.
That’s the real Pro Mode — not something Microsoft sells in an upgrade, but something you build yourself.


Leave a comment